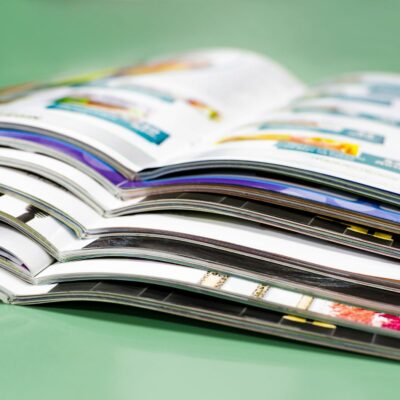
The use of large format for poster printing is now affordable and current technologies allow for high quality renderings. However, it is important to remember that without proper file preparation, it is easy to fail.
From image resolution to choice of typography to colour matching, here are 10 tips for preparing a large format file for print.
Definition of large format for poster printing
The large format for poster printing has dimensions larger than 60x80cm. This type of format is mainly used in the communication and marketing sector. And it is generally the A0, A1 and A2 formats that are preferred for large format printing.
Depending on the desired look of the large-format poster, it is possible to choose lamination, lamination or lamination on rigid substrates as a finish. In all cases, the printing can be personalised to meet the customer's expectations. This is true for all types of media.
Tip 1: Work on a reduced homothetic scale
When sending the file to the printer, you can choose between :
- Send the file at full scale with a resolution of at least 150 DPI.
- Send the file at a reduced size, with a resolution of 300 DPI for a 50% file or 600 DPI for a 25% file.
If the proportions are not respected, the rendering may be pixelated. It is therefore important to ensure that the files are the correct size and resolution before sending them to the printer.
Tip 2: Image format and resolution
The preparation of your files must also include the calculation of the format for poster printing in relation to the image resolution. Whether you are printing a photo poster or a classic poster, you need to calculate the number of pixels per centimetre.
It is interesting to remember that resolution is related to the quality and sharpness of an image. More concretely, it corresponds to the number of pixels contained in the image and is expressed in dpi (dots per inch) or in dots per cm. The higher the resolution, the better the image quality.
The resolution is typically 72 dpi or 96 dpi on computers and 144 ppi on iOS tablets. When printing an image, the basic measurement is cm, not pixel. Also, to look good, the image should be at least 300 dpi or 300 dots per inch.
To find out the maximum size at which you can use an image from the pixels, you need to use the rule of . Here is precisely the calculation you will have to make:
- Number of pixels x 2.54 cm (inch size in cm) / 300 (desired resolution in dpi)
- So for an image of 2480 pixels wide, the calculation ( 2480 px * 2,54 cm/300 dpi = 21 cm) will indicate that your image cannot be more than 21 cm at the risk of seeing its sharpness degraded.
- By repeating the calculation on the length, you can then deduce the maximum size of the image.
Tip 3: Bleed and cut lines
As a reminder, bleeds help to simplify the cutting of the file and avoid white borders on the contours in case of shifting at the time of cutting. While adding bleeds is generally recommended when processing small format files, it is not necessarily necessary on a large format file for poster printing.
The same applies to the cutting lines, which are also not compulsory when preparing large format files. However, it is recommended to leave 5 mm marks to help the printer find the margins more easily when cutting.
Tip 4: Font size and typography
When printing a poster in series, it is important to choose the right font size and typeface to ensure that your poster is easy to read. When preparing the large format file for poster printing, make sure to choose a font size of at least 20 pt.
As far as the typeface is concerned, choose one that is easy to read (Arial, Times new Roman, etc.). The printer may not have the desired font available, so you will always have to vectorise the chosen font in the delivered file.
Tip 5: Graphic design within the constraints of fixing.
Some large format media will have specific constraints linked to fixing systems, such as eyelets on tarpaulins. The eyelets will be cut out of the canvas after printing and will therefore impact on the graphic design.
It is important to include this in the design process to avoid placing very important visual elements in the areas concerned. In the case of eyelets, we recommend that you leave a 30-40 mm margin of neutral background in the areas where the eyelets are to be placed (usually in the corners and top edges).
Tip #6: Colorimetry
Between what we see on the screen and the real thing, there are always differences in colour. To print your poster individually, remember to choose the CMYK colour mode (Cyan, Magenta, Yellow, Black), to favour contrasting colours that will be visible from a distance and that will allow your poster to stand out from the environment on which it will be placed.
Avoid the colour mode called RGB (Red, Green, Blue) for large format files for poster printing. It is not suitable for printing files and is generally reserved for web graphics.
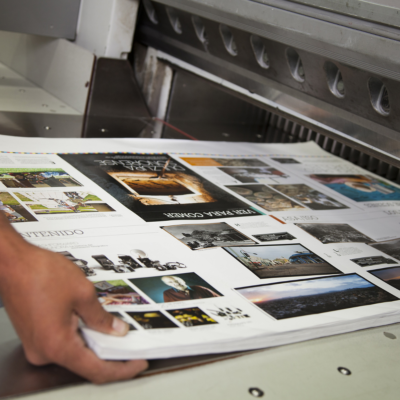
Tip 7: Prepare the print file
Then group all the elements of your large format file for poster printing in a single folder and put it in PDF format to simplify its opening at the printer. These elements should be excluded from the print file:
- .doc (Word), .ppt (PowerPoint), .xls (excel) or .png (image) files
- Elements (images or text) placed too close to the safety margins
- RGB image files
- Non-vectorised fonts
- Images in the wrong resolution
Tip 8: The proof of concept for the poster printing file
The proof stage is recommended before launching a poster print run. This allows you to check the conformity of the document's content before launching the final printing. This will enable you to identify any errors (typos, layout defects, colour or image resolution problems, etc.).
Tip 9: Content hierarchy and respect for the graphic charter
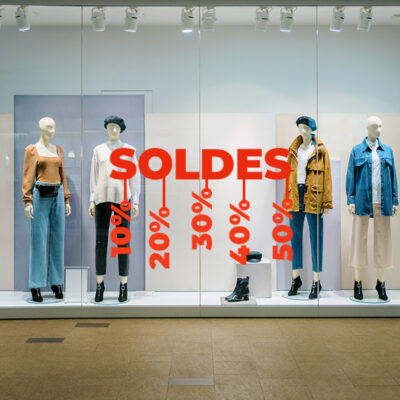
Large-format posters can be used in the urban outdoor advertising network to attract a flow of pedestrians or motorists on the move. The designs must be simple, effective to stand out, attention-grabbing and understandable in a few seconds.
Think of imposing on yourself to transmit only one message at a time by favouring short and impactful catchphrases as well as striking images.
Tip 10: Entrust the project to a professional in the field
All of these tips demonstrate the complexity of successful large format poster printing in terms of both graphic design and technical printing constraints. As you can see from our range of posters and large formats, we have a great deal of experience in preparing and processing large format files for poster printing
Do not hesitate to contact us at 01 42 61 00 33 or to present us your printing project directly at our agency located at 8 rue Saint Roch, 75001 Paris.