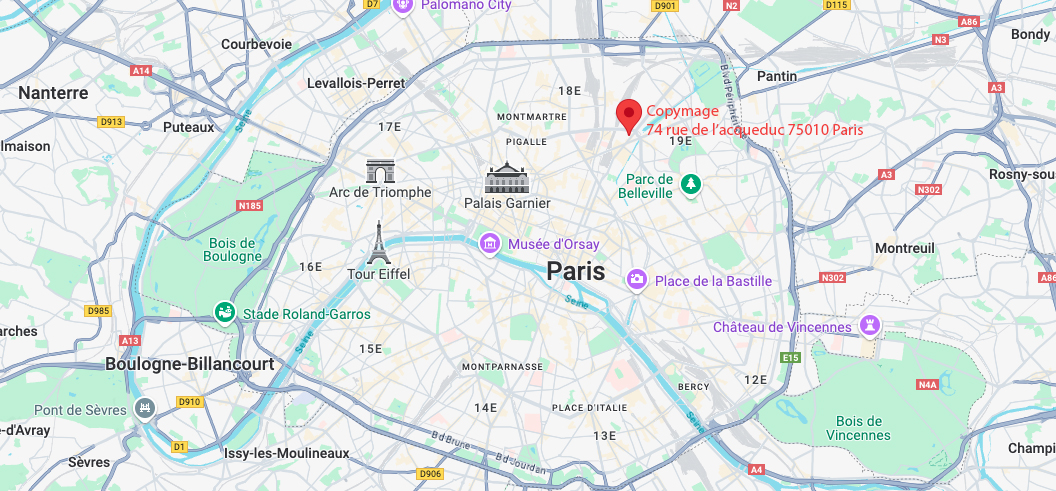
- 📦 ON DÉMÉNAGE !🏭 COPYMAGE INTÈGRE L'IMPRIMERIE NOEL : 74, Rue de l'Aqueduc 75010 Paris✨ Nous allons faire la même chose, mais à un autre endroit ! ✨
- 📦 ON DÉMÉNAGE !🏭 COPYMAGE INTÈGRE L'IMPRIMERIE NOEL : 74, Rue de l'Aqueduc 75010 Paris✨ Nous allons faire la même chose, mais à un autre endroit ! ✨
- Call us 01 42 61 00 33
Monday to Friday 9:00 - 18:00 IMMEDIATE
CUSTOMISED QUOTERETRAIT EXPRESS
& LIVRAISON J+1-
-
- All
products - Cards
- Brochure
Files - Advertising
- Printing
- Office automation
- Adhesives
- Signage
- Themes
- Printing
Express in 4H

Tips & tricks from your printer
10 tips for a successful sticker
Among the most appreciated communication tools for their fun and practical side, stickers win all the polls. Decorative, attractive and inexpensive, their advantages are just as noticeable in a marketing approach as in a communication operation.
For its optimal use, it must be printed successfully. Whether you are creating a small or large format model, here is everything you need to know to make a success of your sticker.
Create an original sticker
To communicate a brand image on a large scale, stickers are ultra-practical. Bold and original, it lends itself to all kinds of customisation so that the final result corresponds to the brand's DNA and perfectly conveys the message it wants to convey.
It is not easy to make a success of a sticker, as it is necessary to ensure both its design and its printing. As for its uses, it will be possible for example to create a transparent window sticker with a customised cut with a personalised visual and more sought-after shapes: diamond, round, square, etc.
Making a success of your sticker by defining your objective
As with any other visual communication medium, it is essential to define the purpose of the sticker. This will enable you to refine your choice, whether in terms of size, format or colour.
The final result of the sticker must meet the needs, but above all, the use that you wish to make of it. To make a success of your sticker, you need to know if it will be :
- Used as part of a promotional campaign for a product or event,
- Offered as goodies or gifts to customers,
- Used as a decorative element.
Once the future use of the sticker has been defined, it will be easier to choose a particular type of sticker in the desired shape and format.
Choosing the optimal format for your use
Small format stickers are popular for creating small communication materials.
The small format stickers can be either :
- Individual and sold one by one for easy distribution
- In A3 or A4 format, they combine practicality with a very attractive price-quality ratio
- Or in rolls, particularly suitable when a large number of stickers need to be stuck on.
Note that monomeric models are preferred for indoor use and for the design of small format stickers.
Polymeric models are recommended for successful stickers for outdoor use, especially for printing large-format adhesives. Whether it is for the design of a window sticker, an adhesive lettering, a car sticker or a vinyl for the floor.
Floor vinyl is, for example, the type used in airports and railway stations for signs (directional signs, safety distance signs, etc.).
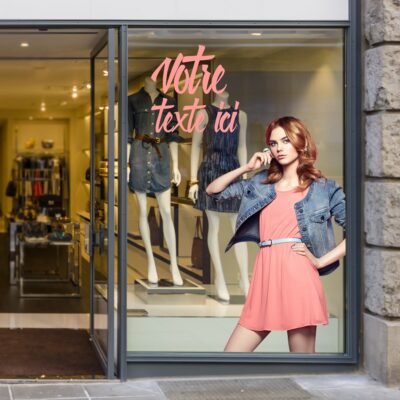
The window sticker is often transparent and gains in creativity thanks to the multiple customizations that can be made. It allows you to enhance your shop window and encourage passers-by to enter your business.
It is worth remembering that car adhesives can be chosen from white monomer and polymeric substrates, frosted or transparent. They allow you to communicate about your company in all your movements without obstructing the driver's visibility.
Targeting your audience
To be successful in your communication campaign, it is important to know your audience. To do this, do targeted research and find out what your potential customers like, what they need, where they go and where you can reach them.
This fine mastery of your audience will allow you to design a sticker with a striking message that will effectively capture their attention and even generate word-of-mouth. This will allow you to easily gain notoriety while limiting advertising investments.
To make a success of your sticker, you must also work on creating a visual that meets the expectations of your target customers. Originality will be required in order to stand out from the competition and be noticed by your future customers. More concretely, the visual of your sticker must be adapted to both your needs and those of your target prospects.
Making a success of your sticker by choosing the right cutting shapes
Choosing die-cut stickers remains the best option for a fine and professional look. In any case, it is important to know that the stickers can be cut to the shape of your choice:
- Either standard shapes: round, square, rectangle, oval
- Or customised shapes to match the exact shape of the object of your choice (such as your logo, a symbol of your activity or an iconic product of your offer). In this case, the file to be printed must be delivered with a cutting line symbolised by a magenta or black line on an additional layer.
If no cutting is requested then the file will be delivered with bleed and white frames.
Choosing the right printing options
As far as printing options are concerned, in order to make a success of your sticker, it is advisable to carry out a systematic lamination or what is commonly called lamination. More specifically, this involves covering the adhesive with a transparent film to increase its lifespan.
This technique is mainly used for large format stickers to ensure good resistance to weather and UV. For small format stickers, it is of course possible to add these finishes to small format stickers to give them a more qualitative look.
Making a success of your sticker by working on the graphic design
To make a success of your sticker, you must also consider the graphic design, which must combine efficiency and creativity. Printing your sticker and realising at this stage that you have missed the visual would be disastrous.
So take the time to design a visual that grabs attention at first glance and arouses curiosity. Use a graphic designer if necessary and make sure that the design is fully in line with your graphic charter, which will ensure immediate recognition of your brand and help to strengthen your reputation.
It is not enough to design an attractive visual, you must also ensure that the message is understandable and easily readable. To make a successful sticker, you should avoid inserting too much information on small formats as this creates an unattractive clutter.
Stick to the essentials and keep it simple by including only the logo and a tagline. For large formats, opt for a clean style and as the content must be visible from a distance, the choice of typography and visuals is essential.
Successful stickers also mean knowing how to distribute them
The success of a sticker is not limited to the design and printing phase. It must also be distributed in a clever way to increase its visibility and effectiveness. The aim is for it to arouse curiosity and attract attention.
This will allow you to display it well, for example on a delivery box or gift basket if you use it as a welcome kit.
As far as board stickers are concerned, consider offering them at trade fairs or exhibitions.
For large stickers, stick them in a high-traffic area such as a waiting room, in front of the reception desk or on the wall of a high-traffic area. For use in shops, attach the sticker to the shop window or cash register, for example.
In any case, the sticker must be visible to everyone and attract the attention of passers-by as they pass.
Successfully applying your sticker
To stick a small sticker easily, you will need a plastic or felt scraper. Before applying the sticker, dust and degrease the surface with household alcohol, which will improve the adhesion of the sticker.
Start by separating the sticker from its backing and place it in the desired location. Glue from top to bottom, taking care to remove air bubbles with the squeegee from the centre to the edges.
For large stickers that are over 50cm in height or length, consider using masking tape to make it easier to position. You will also need a cutter to cut out the backing during installation.
Start by placing your sticker where you want it to be by holding the four sides with adhesive tape. Also place it in the middle of the sticker, either horizontally or vertically, depending on the size of the design to be stuck on.
Then peel off the backing paper, making sure that the sticker remains stuck to the transparent film. Then stick the sticker by removing air bubbles with the squeegee from the centre to the edges. Finish the application by ironing over the whole of your sticker with a cloth.
Last but not least, avoid recurring errors in your file
As a professional printer, we process thousands of files per year and have noticed that a certain number of errors are recurrent. We wanted to list them for you in the form of a checklist to be checked before delivering the file and thus enable you to guarantee the success of your communication campaign and the success of your sticker.
Here are some of them:
- Choosing an inappropriate medium, which does not correspond to the intended use.
- Neglect the choice of visuals and end up with an unattractive communication tool.
- Not respecting the technical data and ending up with an unsuitable file for printing.
- Put too much information on the sticker and you end up with a product that is not very effective.
- Do not place text closer than 5 mm from the edge.
- Do not place the fillet closer than 2 mm from the edge, as even a few tenths of an inch will be visible to the eye.
- For black, use this value in your Photoshop palette 30% Cyan, 30% Magenta, 30% Yellow and 100% black
- Do not use a font (typography) smaller than 5 points.
Finally, check that your file is in CMYK (Cyan, Magenta, Yellow, Black) colour mode and not RGB (Red, Green, Blue) and that the resolution of your file is 300dpi.
We hope that these few tips have given you a clearer idea of how to create the ideal sticker. Don't hesitate to contact us if you have any sticker creation projects, our team will be happy to propose you models with shapes and finishes that will best suit your needs.
Our rates
The best prices on the market
The quality
We are demanding and attentive to your satisfaction
Our deadlines
Tight deadlines thanks to our continuous production system
Imprim'vert label
We are careful about our footprint and waste management. We have obtained the Imprim'vert label.
Help & Advice
Our experts are here to help you.
HELP & ADVICE
Our experts are here to help you. Do not hesitate to contact them.
Adresse
74 rue de l’Acqueduc 75010 Paris
Métro
Ligne 2, 5, 7 : Stalingrad
Ligne 7; 7B : Louis Blanc
Bus
Lignes : 26, N42, 45, 48


